Free HK shipping for orders above 500 HKD. Free worldwide shipping for orders above 200 USD.

How to Make Your Own Soap Out of Essential Oils

April 03, 2018 0 Comments

HoPE - How to make your own soap out of essential oils

Making homemade soaps is fun, rewarding, and practical. As we know, essential oils are packed with therapeutic benefits. We get these benefits from the essential oils through its strong aroma and skin application. That is why essential oils are great when used with soaps – you can smell it and feel it! Plus making your own soap will allow you to customize each batch depending on your current needs. Read on so you won't miss anything.

Why Would You Make Your Own Soap?

No one knows your body more than you do, and nobody else knows the exact scent you love that helps you relax or lift your spirits. When you make your own soap, you will be able to choose what ingredients to include that will be beneficial to your personal health needs and improve your aromatherapy regimen while bathing. For those with chronic skin conditions like eczema, atopic dermatitis or skin asthma, it is quite a challenge to find products that will not exacerbate your skin conditions. Making your own soap will allow you to add natural ingredients and essential oils that will help you with the healing process.

Aside from the health benefits, making your own soap helps you save money. Most of the ingredients, like essential oils, have many different uses and will surely not go to waste. It is a good way for you to use up your essential oils too! And once you get the hang of soap making, you may start making them in bulk and give them away to your family and friends. Who knows, this may encourage them to start a natural lifestyle too.

It’s All About the Chemical Reaction

When making your soap with essential oils, you need to make sure that you choose only high quality and pure essential oils. This is what will give your soap that amazing character, aroma and health benefits.

For you to enjoy the aroma of your soap, remember the scent notes. It's time to apply what you've learned from our Ultimate Guide to Blending Essential Oils, below is a table that shows essential oils that belong to each scent note:
Aside from scent notes, another thing to consider when making soap with essential oils is what you will be using the soap for.
  • Acne – Geranium, grapefruit, lavender, lemon, lemongrass, peppermint, petitgrain, rosemary, and tea tree
  • Eczema – Cedarwood, geranium, lavender, peppermint, rosemary
  • Oily Skin – Geranium, lavender, lemon, lemongrass, orange, petitgrain, rosemary, tea tree
  • Wrinkles / Stretchmarks – Geranium, grapefruit, lavender, orange
  • Dandruff – Cedarwood, eucalyptus, lavender, lemon, rosemary, tea tree
  • Hair growth – Cedarwood, grapefruit, lavender, rosemary
  • Insect repellent – Cedarwood, geranium, lavender, lemon, lemongrass, rosemary
  • Antibacterial – Geranium, grapefruit, lemon, lemongrass, sweet orange, tea tree
  • Deodorizing – Eucalyptus, geranium, lavender, lemongrass, petitgrain

Soap-making Methods You Can Try at Home

Now that you know what you will use your soap for and decided on its aroma, it's time to start making the soap! There are four main methods to making soap at home, there is the melt and pour method, the cold process, the re-batching method and the hot process. Here you'll learn about the melt and pour and cold process because these are the best for beginners.

Melt and Pour

This is the easiest and simplest way to make soap at home. To get started, you'd need an uncoloured and unscented soap as a base, your essential oils of choice, and any other additives like colorants and moisturizers. First, cut the soap base into cubes or chunks so it would be easier to melt. Place the soap chunks in a microwave safe glass container and melt in the microwave for 30 second bursts. Make sure to stir your soap every burst. Repeat this process until all the soap is dissolved. Add your essential oils and additives then pour the mixture into a mold and let it cool and you're done. Easy right? Melt and pour soaps are ready to use once they cooled but they don't last very long because it is easy to melt.

Cold Process

Cold process is where you make your own soap from scratch and it is the most popular method. Here you'll need to combine your oils with lye or sodium hydroxide. Unlike melt and pour, cold process yields long-lasting soaps. Also, you have to be patient when making soaps using this method because it requires 4 weeks curing time. That means, after waiting for 24 hours for the finished product to cool, you'll have wait 4 weeks more before you can use your soap. 
What you'll need to make soaps using this process: 
  • Gloves, mask and goggles for safety! 
  • Heat-resistant, non-reactive containers like tempered glass containers 
  • Stainless steel stirrer or more preferably, stick blender with stainless steel shaft. Hand stirring soaps can take hours, so the stick blender will help a lot! 
  • Soap molds. You may use wood, plastic or silicon molds, or you may reuse your old household plastic containers. 
  • Your ingredients: lye, distilled water, soaping oils (coconut, olive or sweet almond oil), additives (essential oils, colorants, moisturizers, exfoliating agents, etc.) 
 
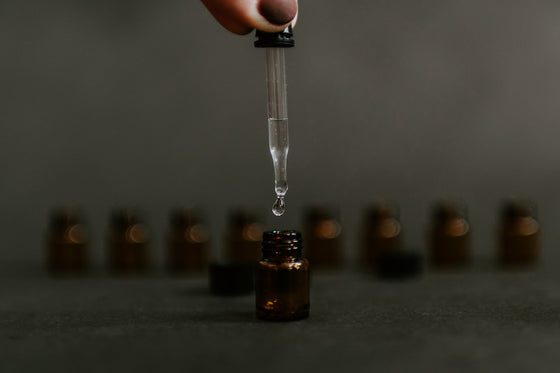
To start making your soap, measure your water and lye in separate containers then carefully pour the lye in water. Stir the mixture until the lye is dissolved. It will become quite hot so be careful if you need to move it. Let this mixture sit and cool.  While waiting for the lye to cool, heat up your soaping oils until they reach 100 degrees. Then let it cool as well. Once the oils are cool enough to match the temperature of the lye mixture, combine them together and stir using the stick blender until they reach “trace” consistency (pudding-like consistency). Then you can add your essential oils and other additives. Stir your mixture some more until it thickens. Pour them into your soap mold and let sit for 24 hours. After 24 hours, remove the soap from the mold, cut it to your preferred size, and leave it in a dry place for 4 weeks. This is known as the curing process where the soap will lose some of its water and will harden more.   
 

Are you ready to make your own soap? Drop us a line if you'd like to know what essential oils go well together to help you achieve the maximum health benefits from them.


Also in What's New

The Art and Science of Blending Essential Oils: A Comprehensive Guide to Creating Custom Aromatherapy Blends

October 24, 2023 0 Comments

Welcome to the fascinating world of essential oils. These potent elixirs, derived from nature's bounty, pack a powerful punch when it comes to therapeutic benefits and delightful aromas. Our aim with this comprehensive guide is to make the art and science of blending essential oils accessible and enjoyable for everyone, whether you're a seasoned aromatherapist or a curious newbie.

Continue Reading

The Ultimate Guide To Essential Oils For Stress Relief: 15 Proven Oils To Alleviate Anxiety And Stress

October 11, 2023 0 Comments

Continue Reading

My Favorite Orange Rolls Joy the Baker

December 29, 2022 0 Comments

Continue Reading